Your Cart is Empty
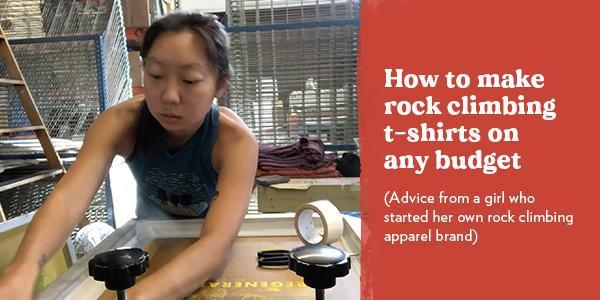
How to make rock climbing t-shirts on any budget

How many times have you gone on a climbing trip, and come up with an idea that would look GREAT on a t-shirt?
Your friends say, “You HAVE to put that on a shirt. I’d totally rock it.” A 4-hour car ride becomes an intense brainstorm on how to make this t-shirt actually happen in real life. But does it ever get there?
Hey! It’s Leslie from Dynamite Starfish, and I can TOTALLY relate. I mean… that was me, for such a long time!
Even though I'm an artist and designer, it took me a REALLY long time to figure out how to efficiently make t-shirts for my budget. Now I run a thriving apparel brand that sells lots of funny rock climbing t-shirts and gifts!
I’m going to walk you through the some of the lessons I learned from building a rock climbing t-shirt business from the ground up so that you can put your own rock climbing designs on t-shirts (or tanks, or whatever) at any scale. Whether you’re just making one t-shirt for yourself, or hundreds for a big event!

Step 1: Start with a good idea (Design tips)
If you're reading this article, chances are you already have your winning idea in mind. You just have to get it done. But some of you may be looking for ideas because you have a climbing competition coming up and you need t-shirts for your team but don't know where to start.
Know your objective and your message. If your t-shirt is a team t-shirt for a climbing competition, make sure your team name is large and legible. Try to stay away from designs that are too small or too detailed to be seen from far away. This is general rule, and not specific to just team tees.
If your t-shirt is just for fun, you really CAN do whatever you want, but I guarantee you that you will get more compliments if other people can see, read, and understand your design.
 Suggestion: Make lots of sketches first! Nothing is too silly. Put it all on paper.
Whatever your design style may be, do your best to make sure the message you’re conveying is consistent with the style you are working in. For example: If you’re trying to create a design that feels natural and free, don’t use colors that are too dark and heavy or too many big, angular graphics. That would be out of place, unless very artfully done.
Will you be including words? Pick an appropriate font - or just draw the words in yourself! That’s my favorite way of integrating art + text. If you’re not the one creating the artwork, invest in a good designer that you communicate well with.
Step 2: Think and plan ahead
While you are creating this design, start thinking ahead to the type of printing process you will be using. The process you choose might mean you have to create the artwork in a totally different way than you thought you would! I’m going to break this down into quantity categories for you, since I find that to be the most relevant way to think about printing processes (with one exception).
Don't forget to think about what color t-shirts you'll be printing on! Unless you are using screen printing, or vinyl cut-outs, darker colors will be significantly harder and more expensive to work with.
A few easy ideas for getting blank t-shirts:
- Use shirts you already have
- Shop at secondhand stores like Goodwill or the Salvation Army
- Purchase blank t-shirts at craft stores or places like Wal-Mart, Target, etc.
I won't go too far into where to get your t-shirts in this post, because it's a whole different topic in itself! Just remember, the internet is your friend, and you can find SO much information about where to buy t-shirts from a huge number of resources.
Step 3: Print!
Before you get started, think: will you be making under a dozen shirts? Or more than a dozen?
Start reading here for under a dozen, or scroll down to read my recommendations for a dozen or more.
Under a dozen shirts
To print anywhere from one to say, a dozen of shirts for you and your climbing crew, I’d recommend a few different methods.
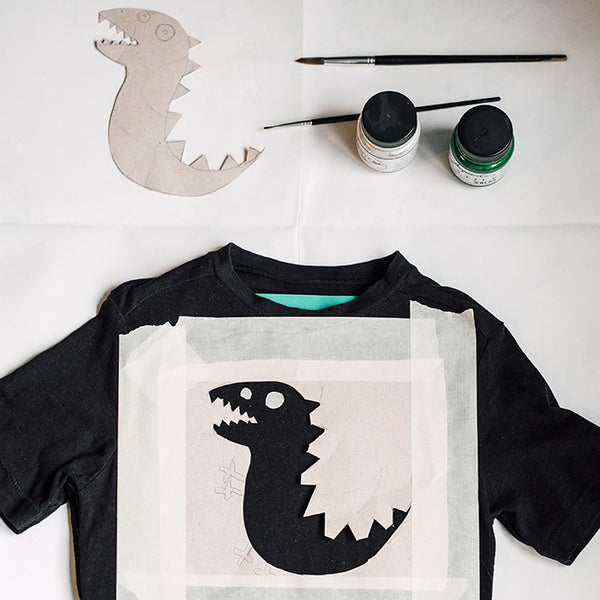
Method 1: Get out your paints!
This first method is for true arts & crafts enthusiasts. Did you know that you can draw directly onto t-shirts with fabric markers and paints? The end result is that you’ll get a one-of-a-kind shirt that is 100% your style and your style only. I've done this many times using acrylic paints, fabric markers, and puff paints (remember those?!).
Keep in mind that fabric markers do have a tendency to bleed a little bit, so the art you create will end up just a tad blurry and won't really have crisp edges.
Method 2: Heat Transfers
The second method I want to cover are heat transfers. I don’t actually use this method for my brand, but I have used this method before as a crafts project for fun. You can purchase printable heat transfer paper, print out your design, and iron it on to your t-shirt. Here are some links where you can buy heat transfer paper for light colored t-shirts, and heat transfer paper for dark t-shirts (significantly more expensive).
Method 3: Cricut
The third printing method I want to go over is using a Cricut machine and an iron. Just remember, that this method works best when your design is one color only. This would be a great method for a small number of team t-shirts that include say, a logo and a participant's name on each shirt.
The Cricut can handle some level of detail, but the details must be in the form of shapes. Remember, the Cricut machine is a blade that is cutting into a single sheet of colored material to create your design. So if you can't cut it with a knife (gradients, etc), don't ask your Cricut to either.
Here are some helpful links where you can buy:
Cricut Explore Air Machine ($229)
You will also need some Iron-on Vinyl:
Cricut Everyday Iron-On Black & White Vinyl Starter Pack
Method 4: Direct-to-Garment
Fourth is direct-to-garment printing (DTG). If your artwork is really complex, like a watercolor painting that has a lot of detail or effects, this is going to the be the method that works best for you. DTG machines are REALLY expensive, so you’ll have to find someone that has one. This is most likely to exist at a local print shop - use Google or Yelp to find t-shirt printing businesses near you, and ask if they offer DTG printing. Since DTG is a lot like feeding a t-shirt through an inkjet printer, it’s totally doable to print small quantities. You could even customize your shirts to include things like names or switch up the colors as much as you like!
Method 5: (EASIEST) Online Direct-to-Garment Service
Lastly, if there are no local printers in your area that have DTG printing, you can send in your artwork to an online printing service that has no minimum quantities. Society6, Redbubble, and Zazzle are some good examples. You’ll need to make an account with them, and although these sites are mostly for creators looking to SELL their shirts, it is still a good way, in my opinion, to just get your shirts made.
There will be art requirements - in most cases you’ll need to save your artwork as a sRGB jpg file that is a certain pixel quality. Ok, if you’re not graphics-savvy, this may seem scary to you, but don’t worry! Just save your artwork as a jpg at the largest size available to you - don’t resize your artwork to make it bigger, just save it at the largest size you have. If you resize, you risk the chance of your artwork printing out blurry and pixelated.
The great thing about these services is that they use a process called Direct-to-Garment (DTG) printing, which means you can pretty much use any colors you want, and you can even add details like shading and gradients. Those details can actually be a pain if you’re printing using another process like screen printing (we’ll get into that later).
DTG printing is not unlike running your t-shirt through an inkjet printer, so that means just printing one shirt is totally possible and does not create excess byproducts or waste.
My best suggestion for online DTG printing: Create a “sample order” for yourself that includes the quantity of shirts that you need - you can usually get a discount for buying your own designs. Then, you can take down the design, or if you’re feeling bold, leave it up and maybe others will find it and buy it from you!
A dozen or more t-shirts
Method 1: Direct-to-Garment
If you have a complex design with a lot of colors or gradients, I still would recommend DTG printing here (see above). You should probably shop around for quotes to see if any print providers will give you a volume discount.

Method 2: Screen Printing
That leaves us with my absolute favorite method of printing t-shirts! Screen printing. This is the method I use to print most of my rock climbing t-shirts at Dynamite Starfish. I love the feeling of pushing ink around in my screen, and the process allows me to have a little mental break where all I do for a day is repetitive labor. Maybe that sounds terrible to you, but I really do think it can be relaxing and fun.
The first thing you should know about screen printing is that each color in your design will require a separate screen, or stencil, in order to get the ink down onto the shirt. Basically, think of a small window that you can hold in your hands that doesn’t have any glass in it, but has the window screen intact.
Imagine if you blocked off parts of that screen with tape, then placed the screen on a surface and poured ink onto it. When you lift up the screen, your surface would have ink on the areas the screen was left open, and no ink where it was blocked with tape. The same principle applies to the t-shirt printing method!
In most cases, you can only print one color per screen.
Watch this video to see a little time-lapse of me printing rock climbing t-shirts for Dynamite Starfish.
If you have more than one color, you need to create an additional screen to print the second color, and line up the two screens using a process called registration. It’s not likely you’ll need to know all that much about the technical details unless you plan on actually purchasing all this equipment and printing it yourself, but it’s good to understand this concept in case you’re thinking of getting some made.
Why? Because having lots of colors will multiply the cost of printing. From my experience, it’ll cost you about $35 to have one screen made. So that’s an initial investment of $35 for just a one color, one placement design on your t-shirt, not including the cost of actual printing, which can range anywhere from $3-12, depending on how many shirts you’re asking your printer to make.
If you have two colors, your initial investment for screens would be $70 (That's 2x $35), and your cost of printing per shirt would be anywhere from $6 to $24 (2x the cost of printing one color). So the cost here can get really high, and only be worth it if you are printing lots and lots of t-shirts (or if you’re a rock climbing millionaire). If you're not careful, you could accidentally be spending over $40 per t-shirt just to get them made!
Long story short, ask a local print shop how much they’d charge you for your design. Better yet, take a class on how to do it and do it yourself at their facility if they allow it. You may even have friends who know how to screen print, and you can take your design to them and ask them to help you out!

Conclusion:
The world of printmaking, which includes printing t-shirts is VAST. I’ve just outlined a few common ways to print your artwork onto t-shirts because I get asked about my process all the time. After having tried a bunch of different methods and even getting really crafty and clever with my print methods (like hand-painting screen printing ink onto shirts), I hope what I’ve learned helps you get your project moving.
Good luck. Happy printing and happy climbing!
P.S. Want to check out the rock climbing t-shirts I've made?

Leave a comment
Comments will be approved before showing up.